


Hi everybody!!!
Here is Giò and I today I want show you a lovely idea to decorate a lunch paper bag.
For this creation I used the super cute Whiff of Joy stamps from Princess collection.
For this work you will need:
Lunch paper bag (mine is 4 5/8 x 8 5/8)
Ivory cardstock
Black cardstock
Patterned paper
Magnetic disc
Embellishment as you want
Paper trimmer
Adhesive double sided tape


Cut at 5 3/4 (cm 14,5)

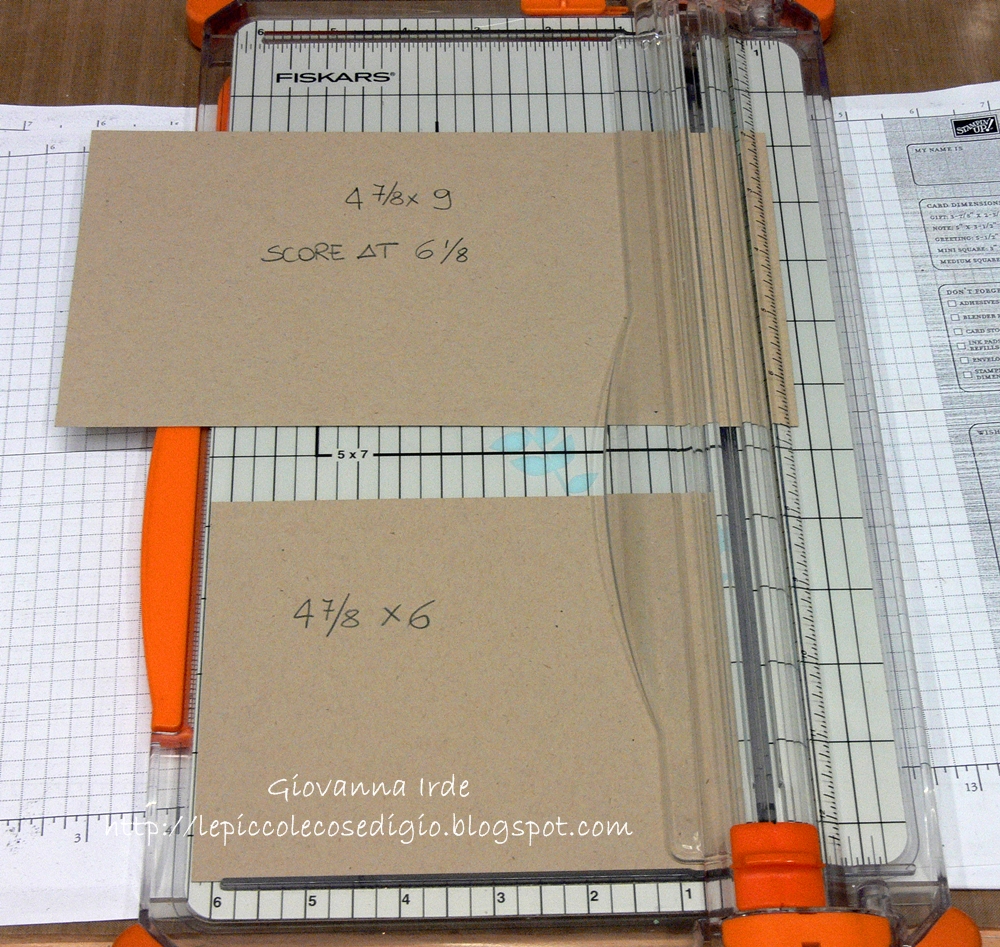
Cut two pieces of Kraft cardstock
4 7/8 x 9 - score at 6 1/8 (cm 12,5x23 - score at 15,5)
4 7/8 x 6 (cm 15x12,5)
Cut three pieces of Black cardstock
4 3/4 x 6 (cm 12x15)
4 3/4 x 5 7/8 (cm 12x14,5)
4 3/4 x 2 3/4 (cm 12x7)

Cut three pieces of different patterned (these are My Mind's Eye from Vanity Fair collection)
4 5/8 x 5 7/8 (cm 11,5x14,5)
4 5/8 x 5 3/4 (cm 11,5x14)
4 5/8 x 2 5/8 ( 11,5x6,5)

Now you can stick all the layers.
Before stick the matting patterned on the Kraft flap, remember to stick a magnetic half disc.

To put in a correct way the second magnetic half disc, you leave it magnetize with the other already stick.
After peel off the protective film of the adhesive you must press down the flap and the magnetic disc is perfect positioned.

Now you can decorate the gift paper bag as you want.
This is the opened bag.

I hope you like my little tutorial...... see you soon!!
Thanks for stopping by
Giò


Wow, stunning creation Gio!! Totally adorable.
ReplyDeleteThis is so pretty anyone would be thrilled to receive a gift in this. Laura
ReplyDeleteGió, this paper bag is wonderful!!!
ReplyDeleteI´ll feature on my blog, with a link back here.
Hope you don´t mind
hugs from Brazil
Rosana
My so Wonderful Gio!!
ReplyDeleteThank you from my heart for the cm :)
Hugs Sonja
xx
This is stunning, Gio!
ReplyDeleteHUGS SUSY
What a lovely bag Gio! Fabulous decorated...
ReplyDeleteHugs Ing
What a great idea using a bag - making it gorgeous! It's definitely something I'm going to try, too! Thanks for sharing.
ReplyDeleteExcellent !
ReplyDeleteMirevan from Chambéry
This project is wonderful thank you for the tutorial.
ReplyDeleteFrancy