Showing posts with label Giò. Show all posts

Monday, January 30, 2012

Polyshrink colored with Polychromos


Good morning to you all!!! 
Here is Giò........ today I want to show you how realize some delicious charms for your jewels.
The technique is the Polyshrink colored with Polychromos.
It is simple and fast and you don't need to be good in coloring so this is a technique that everybody can try.

This is the list of supplies you will need:
Polyshrink
Sand Block
Stamps I used  
Penguin Love
 Birdie Love     
Penguin Trio
Staz On Ink
Polychromos
Johnson's baby oil or if you prefer Mineral  Oil
Scissor
Heat tool
Diamond Glaze or other gloss

First of all you need to sand the Polyshrink surface, in this way the ink will adhere it better.

With Staz On stamp your image on Polyshrink.

 You can color with Polychromos as you prefer, I usually use at least two colors
to take depth to the image.....

 Continue to color and don't exaggerate, remember that when Polyshrink reduce
themselves the colors saturate.

Now with a stump wet with oil blend the colors as they merge in.

 Cut the image carefully.

Punch the top and don't use a too small punch because the hole will grow smaller.

Heat the Polyshrink with the heat tool that will grow smaller. As you heat it the piece will crumple.....
don't be afraid, it will be normal again at the end of the process......

Then to help yourself you can put an acrylic block as you turn the heat tool off.

To protect and polish the surface use a gloss.

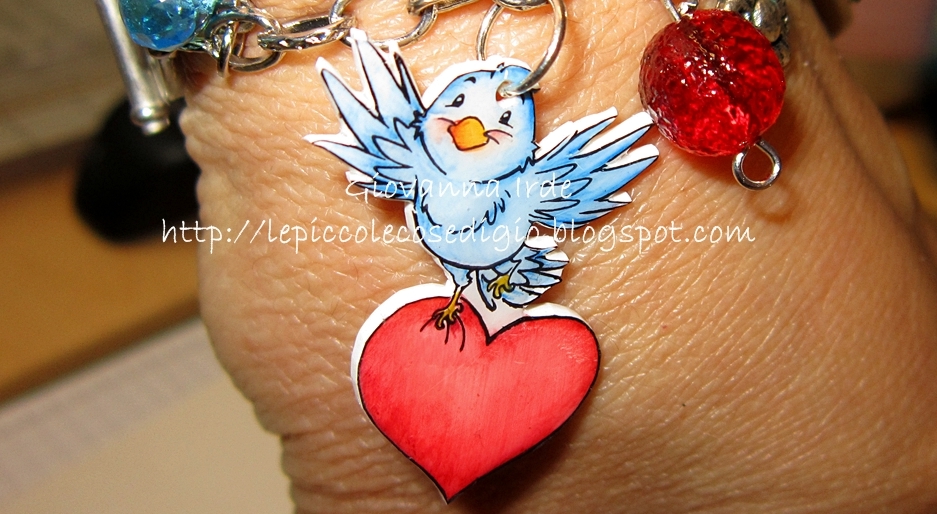
Here are my charms ready..... aren't they too cute?

I realized a bracelet, but you can also realize earrings, necklaces and more else!!!

I really hope that this way to use the stamps will like you and my tutorial will be helpful.

Thanks for stopping by

Giò

Friday, December 16, 2011

Advent Calendar day 16


Buongiorno a tutti!!!
Oggi è il mio turno di ospitare il Calendario dell'Avvento della Whiff of Joy!!!Per tutte voi, speciali creative che avete trovato la finestra giusta, la nostra generosa Katharina offre la possibilità di vincere il timbro che ho usato nel mio lavoro!!!
.... Non è fantastico?? Vi basta lasciare un commento a questo post, avete tempo sino a domani alle 19.00. Alle 20.00 comunicherò il nome del fortunato vincitore.


Good morning to all!!!
It's my turn to host Whiff of Joy Advent Calendar!!
For you special people who have found the right window our generous Katharina offers a chance to win the stamp I used in this card!!!.... isn't it fantastic??
Leave a comment on this blog, we have time until 7.00 pm of tomorrow. The winner will be annunced at 8.00 pm.
Oggi voglio mostrarvi il tutorial per realizzare una card portacandeline.
E' molto facile e può essere un'idea carina per un regalo.
Per questo lavoro ho utilizzato "Willow with Christmascandle".
Today I want show you a tutorial to make a lightcandel holder card.
It's very simple and it can be a cute idea for a gift.
For this creation I used "Willow with Christmascandle"
Tagliate un pezzo di cartoncino di 7 1/2 x 10
Cut a piece of cardstock at 7 1/2 x 10
Sul lato lungo piegate alle misure indicate.
On the long side score at the indicate mesures of the photo.
Ruotate il cartoncino sul lato corto e piegate secondo le misure indicate.
Rotate the cardstock on the short side and score at the indicated mesures.
Ora con le forbici tagliate come indicato nella foto.
Now with the scissors cut as indicated in the photo.
Dopo il taglio questo è il risultato.
After the cut this will be the result.
Con l'aiuto di un cutter o delle forbici, tagliate una finestra lasciando per ogni lato un margine di 1/4.
With the help of a cutter or of the scissors, cut a window leaving for each side a 1/4 border.
Ora tagliate un pezzo di acetato di 1 3/4 x 5 7/8 e incollatelo sulla finestra con del nastro biadesivo.
Now cut a piece of acetate of 1 3/4 x 5 7/8 and stick it on the window with a double side adhesive tape.
Rivoltate in cartoncino e aggiungete il nastro biadesivo come nella foto.
Turn over the cardstock and add a double side adhesivee tape as in the photo.
Per il top tagliate un pezzo di cartoncino di 6 1/2 x 6 e piegate sul lato lungo a 5 3/4.
For the top cut a piece of 6 1/2 x 6 of cardstock and score at 5 3/4 on the long side.
Lungo la linea di piegatura usate il nastro biadesivo per unire il top e la parte che contiene le candeline.
On the score line put the double side adhesive to bind the top and the lightcandle holder.
Ora la vostra card portacandeline è pronta e voi potete decorarla come più vi piace.
Now your lightcandle holder card is ready and you can decorate it as you like the most.
Per oggi è tutto.... spero che il mio lavoro vi sia piaciuto e che parteciperete numerose a questo evento..... e domani ricordatevi di andare a cercare la finestra giusta di questo bellissimo Calendario dell'Avvento.

For today is everything.... I hope my work liked you and that many of you will enjoy on this event...... and tomorrow remember to go looking for the right window for this beautiful Advent Calendar.

Thanks for stopping by

Giò


Thursday, November 17, 2011

Gift paper bag


Hi everybody!!!
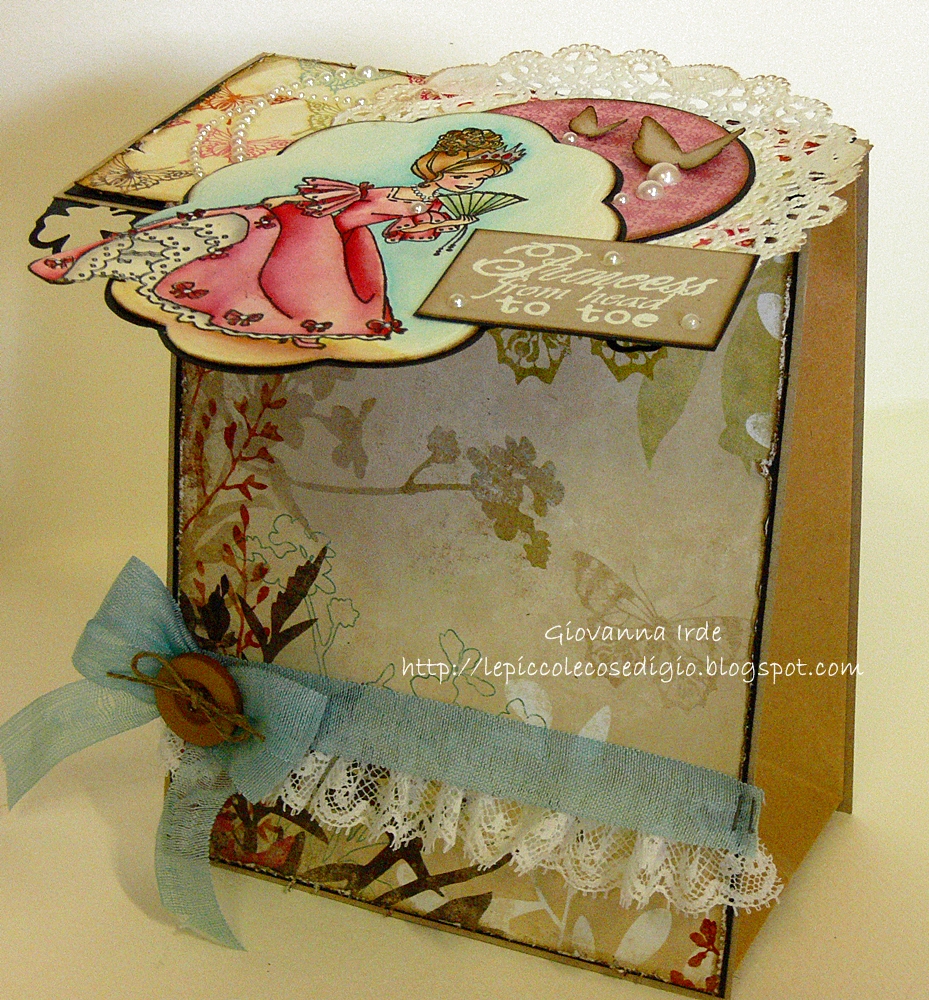
Here is Giò and I today I want show you a lovely idea to decorate a lunch paper bag.
For this creation I used the super cute Whiff of Joy stamps from Princess collection.
For this work you will need:

Lunch paper bag (mine is 4 5/8 x 8 5/8)
Ivory cardstock
Black cardstock
Patterned paper
Magnetic disc
Embellishment as you want
Paper trimmer
Adhesive double sided tape


Cut at 5 3/4 (cm 14,5)

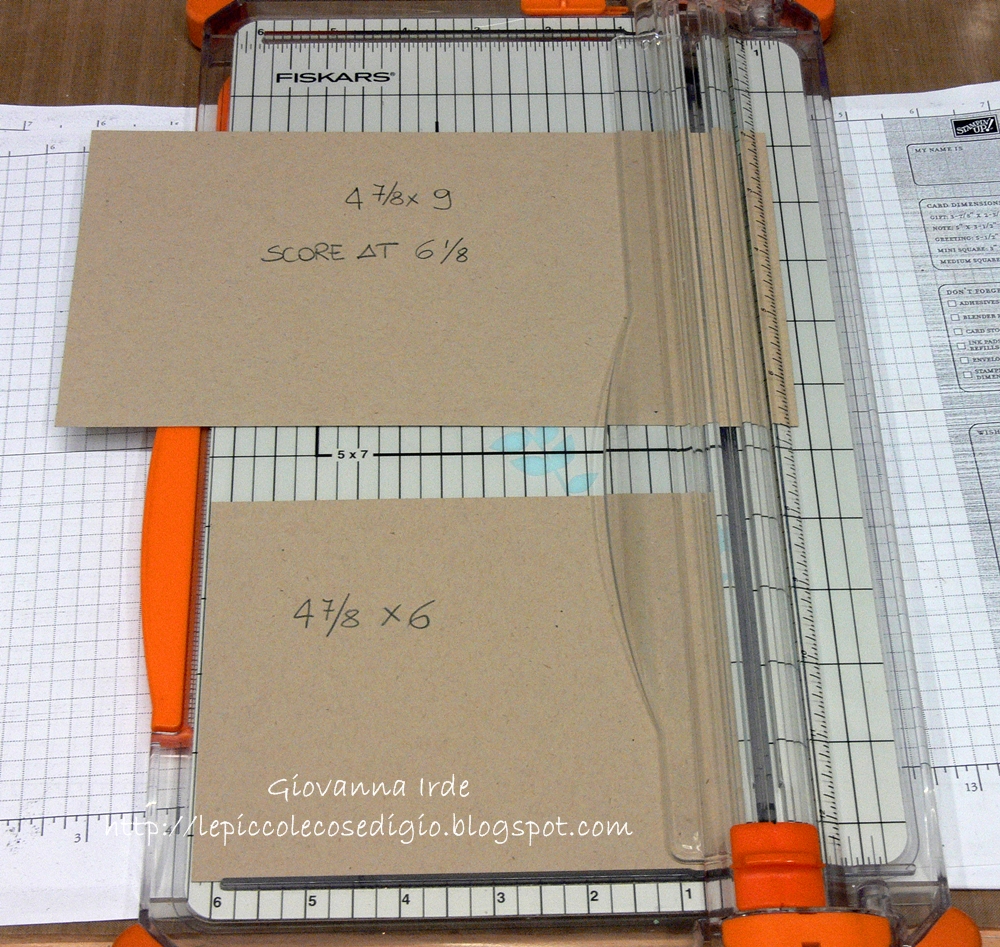
Cut two pieces of Kraft cardstock
4 7/8 x 9  -  score at 6 1/8  (cm 12,5x23 - score at 15,5)
4 7/8 x 6 (cm 15x12,5)

Cut three pieces of Black cardstock
4 3/4 x 6 (cm 12x15)
4 3/4 x 5 7/8 (cm 12x14,5)
4 3/4 x 2 3/4 (cm 12x7)

Cut three pieces of different patterned (these are My Mind's Eye from Vanity Fair collection)
4 5/8 x 5 7/8 (cm 11,5x14,5)
4 5/8 x 5 3/4 (cm 11,5x14)
4 5/8 x 2 5/8 ( 11,5x6,5)

Now you can stick all the layers.
Before stick the matting patterned on the Kraft flap, remember to stick a magnetic half disc.


To put in a correct way the second magnetic half disc, you leave it magnetize with the other already stick.
After peel off the protective film of the adhesive you must press down the flap and the magnetic disc is perfect positioned.


Now you can decorate the gift paper bag as you want.
This is the opened bag.


I hope you like my little tutorial...... see you soon!!

Thanks for stopping by

Giò

Thursday, October 6, 2011


Goodmorning to all, today I want to show you how is simple to create your own background with the newest Whiff Of Joy clear stamps.


This is the list of supplies you will need:
Ivory Cardstock
Essential Background Spot & Dots
Essential Background Spot & Dots II
Versamark Ink Pad
White Embossing Powder
Heat tool
Ink pads of some colors
Blending tool or sponge

The most important steps are three and they will be repeated of every background you want to create.
As first we ink up you stamp with Versamark then we emboss  it with White embossing powder.


The third step is the colouring with a color of your choice, this will consent the colouring of the cardstock, leaving clearly the embossed motive.


Clean up softly with a baby whipe on your cardstock, this will clean the emboss details from left color.


I hope I gave you an idea that likes you and inspires.

Have a fabulous day.


Monday, September 26, 2011

Flip Flap Wish List Book


Goodmorning  to all!!! Today I want show you a lovely template to make a Wish list book...... Christmas is coming!!!! 
To make it I used fabulous  Whiff of Joy stamps which will be on sale 1st October!!!!


Supplied for this card:

Oh Christmas Tree Whiff of Joy stamp
From Heaven Above Whiff of Joy stamps
some Whiff of Joy stamps from old collection

4 pieces cardstock  6"x 11"
8 pieces patterned paper  5 7/8x 5 7/8
6 pieces  5 7/8x 3 7/8
2 pieces 5 7/8x 4 7/8
double sided tape adhesive
Self Adhesive Pearls
Cute Banner Trio

Follow the simple photo tutorial to make one as this!!! 
Have fun!!


This is the inside as I decorate it!!


I hope you liked my little tutorial and if you want to see more photos please visit my blog

Have a great day :)

Giò


Related Posts Plugin for WordPress, Blogger...