Hi everyone. Today i want to share how I make a Tea Bag holder. These make great gifts and can be used for any occasion.
Supply List
Plain Carstock - 4" x 9"
Patterned Paper - 7.5" x 8"
3.75" square cardstock for front panel
3 5/8" square patterned paper for front panel
Image Stamp- Willow with Hot Chocolate
Sentiment stamps - General Sayings II - 15 stamps "English Sentiments"
Border Dies - Verstatile Shape and XOXO
Colouring medium
Embellishments
Ribbon.
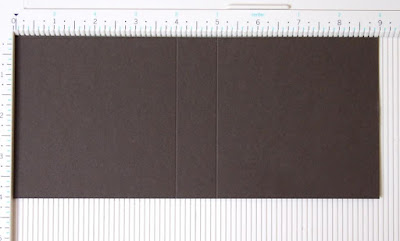
Score your 4" x 9" cardstock at 4" and 5". Fold the score lines and set to one side.
Taking your patterned paper, score at 0.5" and 4" on the 7.5" side. Fold the score lines. Using double sided tape or other adhesive adhere the 0.5" strip to the other side
You end up with a pocket like this
Score the 'pocket' at 3 3/8" and 4 3/8" and fold the score lines
Using a circle punch, or circle die cut, cut out a semi circle on each end of the pocket
Apply double sided tape or other adhesive to the spine and adhere to the inside of your cardstock.
Tie the ribbon loosely around the holder
Decorate the front panel as desired
Adhere the panel to the front of the holder, holding the ribbon in place. Fill pockets inside with tea bags, cold/flu meds, etc and you're done :)
I do hope you enjoyed this tutorial. Don't forget to link up if you try it yourself :)
Sandie
xXx


Very neat idea, thanks for sharing.
ReplyDeleteNatalie
Thanks for sharing this wonderful tutorial with us!
ReplyDeletehugs Yvonne
Fabby tutorial Sandie thanks for sharing!
ReplyDeleteAli x
A wonderfull tutorial thanks for sharing Luv Sue x
ReplyDeleteLove it!!! Thanks for sharing!
ReplyDeleteThanks for the tutorial Sandie! Im definitely going to try this as a gift for a tea loving friend!
ReplyDelete*Hugs*
~Andrea
I love this tea bag holder Sandie; when I try it I'll link up. I was just thinking it would be awesome to include some of those thin square Guiradelli chocolates for a friend!
ReplyDeleteThank you for the tutorial....will have to make one of these for a sick friend......great instructions...
ReplyDeleteSuch a wonderful tutorial! Beautiful project and makes me want to try to make one of these too!!
ReplyDeleteI envy you because you can simply turn anything into a wonderful work of art. Is there something that you are having a hard time creating into a piece of art?
ReplyDeleteidol replicas
Hello, this idea is really pretty; would it be possible to have measurements in centimeters to it you please? Thank you
ReplyDeleteFabulous idea. I would definitely make a sample and if I did it right the first time, I'd probably create more so I can give it as a give-away this coming Christmas. Thanks for the idea!
ReplyDeletefake handbags
Certainly a must-try! Such a unique and lovely craft to make as a present.
ReplyDeleteDiscount Designer Handbags