


Hello!
Natascha is here today to show you a little tutorial of my latest project - a pinboard for my kids room. I still love the cute little Henrys from the latest Spring Stamp Kit and you can combinate them so lovely.
***
Hallo!
Natasch hier, mit einem kleinen Tuturial von meinem letzten Projekt für euch - einer Pinnwand fürs Kinderzimmer. Nach wie vor liebe ich die süßen kleinen Henrys aus dem aktuellen Frühlingskit und ihr könnt sie so toll zusammen kombinieren.
Here is the finished pinboard:
***
Hier ist die fertige Pinnwand:

To get stardet I cut a thick grey cardboard to a size of 20 x 30 cm an use a cork pot coaster from my stash.
***
Um los zu legen schneide ich mir aus dicker Graupappe ein Stück von 20 x 30 cm und nehme mir dazu noch einen kleinen Kork Topfuntesetzer.

I picked some design papers from my stash and cut them in matching sizes to cover the grey cardboard:
- orange cardstock in 29,5 x 19,5 cm
- orange design paper in 29,1 x 19,1 cm
- red carstock in 23 x 15 cm
- red dotted design paper in 22,6 x 14,6 cm
- red cardstock stripe in 5,8 x 19,1 cm
- orange cardstock stripe in 5,4 x 19,1 cm
- orange design paper stripe in 5 x 19,1 cm
- die cut boarder in 15 cm length
- die cut stamped image and sentiment with matching cardstock
***
Ich habe mir einige Design Papiere ausgesucht und sie passend zum Graupappezuschnitt vorgeschnitten:
- oranges Tonpapier in 29,5 x 19,5 cm
- oranges Design Papier in 29,1 x 19,1 cm
- rotes Tonpapier in 23 x 15 cm
- rotes gepunktetes Design Papier in 22,6 x 14,6 cm
- roter Tonpapierstreifen in 5,8 x 19,1 cm
- oranger Tonpapierstreifen in 5,4 x 19,1 cm
- oranger Designpapierstreifen in 5 x 19,1 cm
- gestanzte Bordüre in 15 cm Länge

In addition I have picked some more stamped images from the kit, some ribbons and die cut swirls, doilies and tickets.
***
Außerdem habe ich mir einige Schleifenbänder, weitere gestempelte Motive aus dem Stempel Kit, gestanzte Schnörkel sowie Deckchen und Tickets vorbereitet bzw. vorgestanzt.
***
Außerdem habe ich mir einige Schleifenbänder, weitere gestempelte Motive aus dem Stempel Kit, gestanzte Schnörkel sowie Deckchen und Tickets vorbereitet bzw. vorgestanzt.

To add some more interest to the die cut shapes I stamped some notes from the Spring Kit and backgrounds from the Spots and Dots 2 Clear Stamps Collection.
***
Um den gestanzten Teilen etwas mehr Intresse zu verpassen, habe ich sie mit Noten aus dem Stempel Kit und den Hintergrundstempeln aus dem Spots and Dots 2 Clear Stamps Set bestempelt.
***
Um den gestanzten Teilen etwas mehr Intresse zu verpassen, habe ich sie mit Noten aus dem Stempel Kit und den Hintergrundstempeln aus dem Spots and Dots 2 Clear Stamps Set bestempelt.

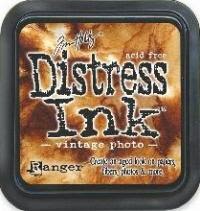
After prepering the most ingredients for the pinboard I used a piece of cloth and the Vintage Photo Distress Ink to wipe the edges of the papers and die cut shapes. I glued the papers together (one design paper and the matching cardstock) and sew them with my sewing machine. After this I add some white paint to the edges and glue every paper layer by layer together. For the embelishments, the cork piece and the ribbon on the background of the cardboard I use my glue gun and glue them with some pressure to the papers. The last step is to add some buttons and lots of gems :).
Voila, and finished!!!
***
Nachdem ich die meisten Zutaten schon vorbereitet und vorgeschnitten habe verwende ich ein Tuch und das Vintage Photo Distress Ink Stempelkissen um die Ränder der Papiere und der Stanzteile zu wischen. Ich klebe die Papiere zusammen (je ein Designpaper und Mattung) und nähe sie am Rand mit meiner Nähmaschine durch. Danach verwende ich weiße Farbe und wische damit nochmals die Ränder. Jetzt nur noch die einzelnen Papierschichten auf einander kleben und die Deko aufkleben. Für die Deko verwende ich meine Heißklebepistole und klebe die einzelnen Teile sowie das Band auf der Rückseite mit etwas Druck aufs Papier. Der letzte Schritt ist das Aufkleben von Knöpfen und Schmucksteinen :).
Voila, und Fertig!!!


Used Whiff of Joy products:
***
Verwendete Whiff of Joy Produkte:


Thank you for stopping by and reading my tutorial.
Hope you like it :)
***
Vielen lieben Dank fürs Vorbeischauen und fürs Lesen!
Hoffenltich gefällt euch das Tutorial :)
Hugs,
***
Vielen lieben Dank fürs Vorbeischauen und fürs Lesen!
Hoffenltich gefällt euch das Tutorial :)
Hugs,
Natascha


Oh, die Idee ist ja total süß!!! Einfach klasse!
ReplyDeleteLG, Susanne.
WOUW this is so gorgeous hun, a really beautiful piece of art, so I´m not even sure I would dare to cover it up, so beautiful it is in it self ha ha ha. Stunning work.
ReplyDelete