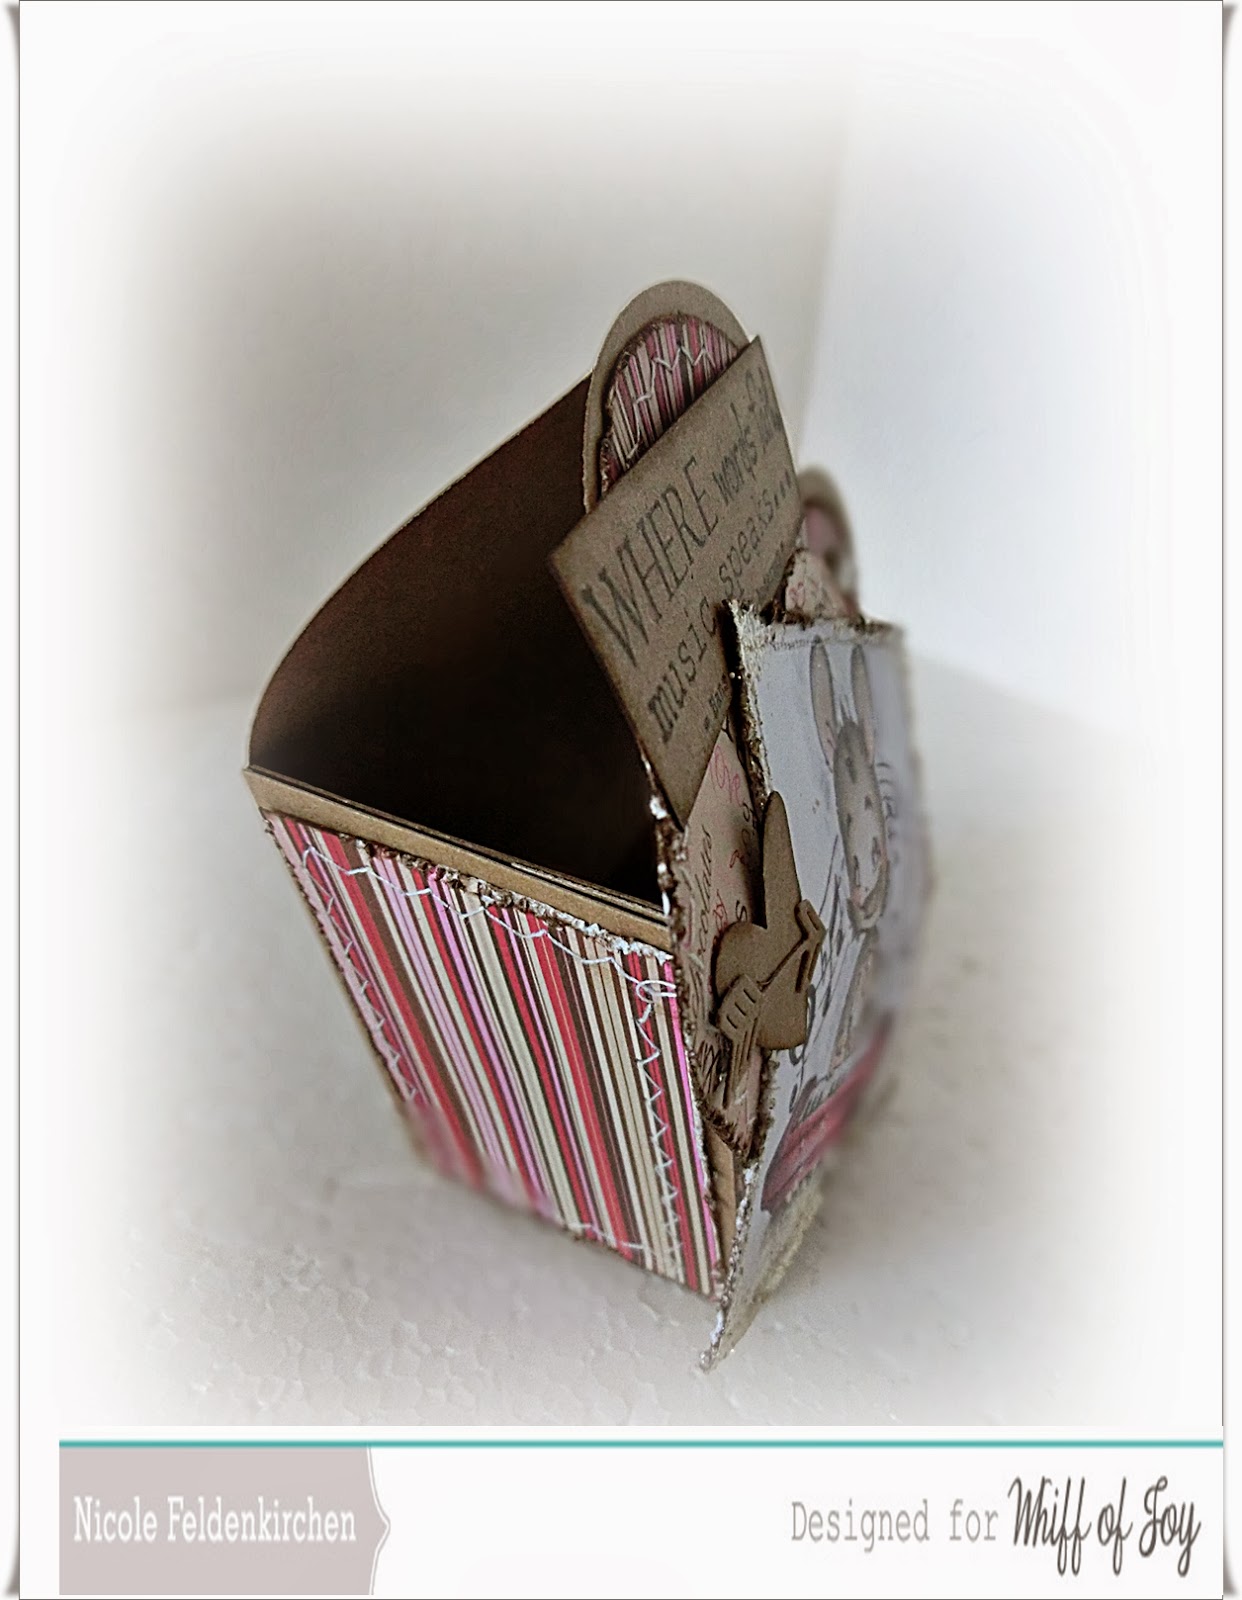
Hi, I'm back with a new tutorial for you.
Do you know the new Heart-Gift-Box-Die from Whiff of Joy?
It's so easy to make wonderful giftboxes with it.
I show you today, that you are not fixed to a specific size of the box.
First I show you my finished box and then how to make it.
~~~~~~~~~~~~~~~~~~~
Hi, da bin ich wieder und zeige euch einen weiteren kleinen Workshop.
Kennt ihr schon die Herz-Geschenke-Box-Stanze von Whiff of Joy?
Es ist wirklich kinderleicht mit ihr tolle Geschenkschachteln zu basteln.
Und heute zeige ich euch, wie ihr die Größe der Schachtel variieren könnt.
Aber zunächst einmal die fertige Box und danach zeige ich euch, wie ich sie gewerkelt habe.
Isn't that such a sweet image? I may tell you, that this cute Henry is one of those you can get, if you order the secret stamp kit, which you can order only a short time.
And also the wonderful matching sentiment.
~~~~~~~~~~~~~~~
Ist der Henry nicht süß? Ich darf euch ein kleines Geheimnis verraten.
Es ist einer von ganz vielen süßen Stempeln des geheimen Stempel-Kits, welches ihr noch kurze Zeit ordern könnt. Und der passende Spruch ist auch dabei.
And this is the way, I have made the box.
I have punched the hearts two times.
In addition to that you need two pieces of cardstock.
And here ist the point, where you can choose, how big the box should be.
The length is always the same, 7,5cm.
But the wide you can vary. I choosed 5cm.
~~~~~~~~~~~~~~~~
Und nun zeig ich euch, wie ich die Box gemacht habe.
Als erstes braucht ihr die ausgestanzten Herzen 2x.
Zusätzlich braucht ihr noch 2 Stücke Cardstock. Und hier könnt ihr nun wählen, wie breit die Box werden soll.
Die Länge bleibt immer gleich, 7,5cm.
Aber je nach Weite, wird die Box kleiner oder größer.
Ich habe mich für eine Breite von 5cm entschieden.
First fold the lines.
Make sure that the small strap faces inward.
~~~~~~~~~~~~~~~
Als erstes falzt die Linien nach.
Achtet darauf, dass die kleine Lasche nach innen zeigt.
Now the both hearts will be stuck together.
Put a little sticky tape on the strap and then put one of the cardstock-pieces on it (as you can see on the next two pictures).
~~~~~~~~~~~~~~~~~~~~~~
Nun werden die Herzen zusammen geklebt.
Einfach ein bisschen Klebeband auf die Lasche und dann das Stück Cardstock ankleben, so wie ihr es auf den nächsten 2 Bildern sehen könnt.
That's the way it should looks like, when one side is glued together.
The same you do with the other side.
~~~~~~~~~~~~~~~~
Und so sollte es dann aussehen, wenn ihr eine Seite zusammen geklebt habt.
Das macht ihr jetzt auch mit der anderen Seite.
Inside, now you have the to little straps.
Make sure, that they are fold and glued contrary, so they give a little stability.
~~~~~~~~~~~~~~~~
Innen seht ihr nun die kleinen Laschen.
Achtet darauf, dass ihr sie gegenüber faltet und klebt, so dass die Box stabil wird.
Thus, the box looks a bit nicer, you put also a little piece of cardstock from the inside.
My piece have also the size of 7,5 x 5cm.
~~~~~~~~~~~~
Damit die Box auch von innen schön aussieht, klebt man auch von innen ein Stück Cardstock ein.
Meins hat die gleiche Größe wie das äußere, nämlich 7,5 x 5cm.
Now you can almost start with embellishing.
After I put the pattern paper on it, I punched two wholes in it.
Either you need it to close the box, maybe with a brad (just like I did). Or even you pull a ribbon trough.
Just like you want it.
~~~~~~~~~~~~~~~~
Jetzt kann man fast schon anfangen, die Box zu verzieren.
Nachdem ich das Designpapier aufgeklebt habe, habe ich 2 Löcher je Seite reingestanzt.
Entweder man schließt die Box mit Brads (so wie ich es getan habe) oder man kann sie auch offen lassen und Bänder durch die Löcher ziehen.
Das ist jedem selber überlassen.
Well, it's finished. And now I have plenty of room for whatever I will put into the box. ;o)
Thanks for stopping by and have fun with try it.
~~~~~~~~~~~~~~~~
So, die Box ist fertig und groß genug und ganz viel von dem reinzutun, was ich rein tun möchte. ;o)
Danke für's Lesen und viel Spaß beim Nachbasteln.
I have used these thing from the Whiff of Joy Store: / Diese Dinge aus dem Whiff of Joy -Shop habe ich benutzt:


.jpg)


...traigo
ReplyDeleteecos
de
la
tarde
callada
en
la
mano
y
una
vela
de
mi
corazón
para
invitarte
y
darte
este
alma
que
viene
para
compartir
contigo
tu
bello
blog
con
un
ramillete
de
oro
y
claveles
dentro...
desde mis
HORAS ROTAS
Y AULA DE PAZ
COMPARTIENDO ILUSION
CON saludos de la luna al
reflejarse en el mar de la
poesía...
ESPERO SEAN DE VUESTRO AGRADO EL POST POETIZADO DE 12 AÑOS DE ESCLAVITUD, MASTER AND COMMANDER, LEYENDAS DE PASIÓN, BAILANDO CON LOBOS, ...
José
Ramón...
What an awesome project here hun. It is sooo beautiful and an awesome tut as well. Great job done here and a gorgeous outcome of it too.
ReplyDeleteDie Herzbox sieht einfach wundervoll aus, eine ganz tolle Gestaltung!
ReplyDeleteLG
Michaela