Monday, January 30, 2012

Polyshrink colored with Polychromos


Good morning to you all!!! 
Here is Giò........ today I want to show you how realize some delicious charms for your jewels.
The technique is the Polyshrink colored with Polychromos.
It is simple and fast and you don't need to be good in coloring so this is a technique that everybody can try.

This is the list of supplies you will need:
Polyshrink
Sand Block
Stamps I used  
Penguin Love
 Birdie Love     
Penguin Trio
Staz On Ink
Polychromos
Johnson's baby oil or if you prefer Mineral  Oil
Scissor
Heat tool
Diamond Glaze or other gloss

First of all you need to sand the Polyshrink surface, in this way the ink will adhere it better.

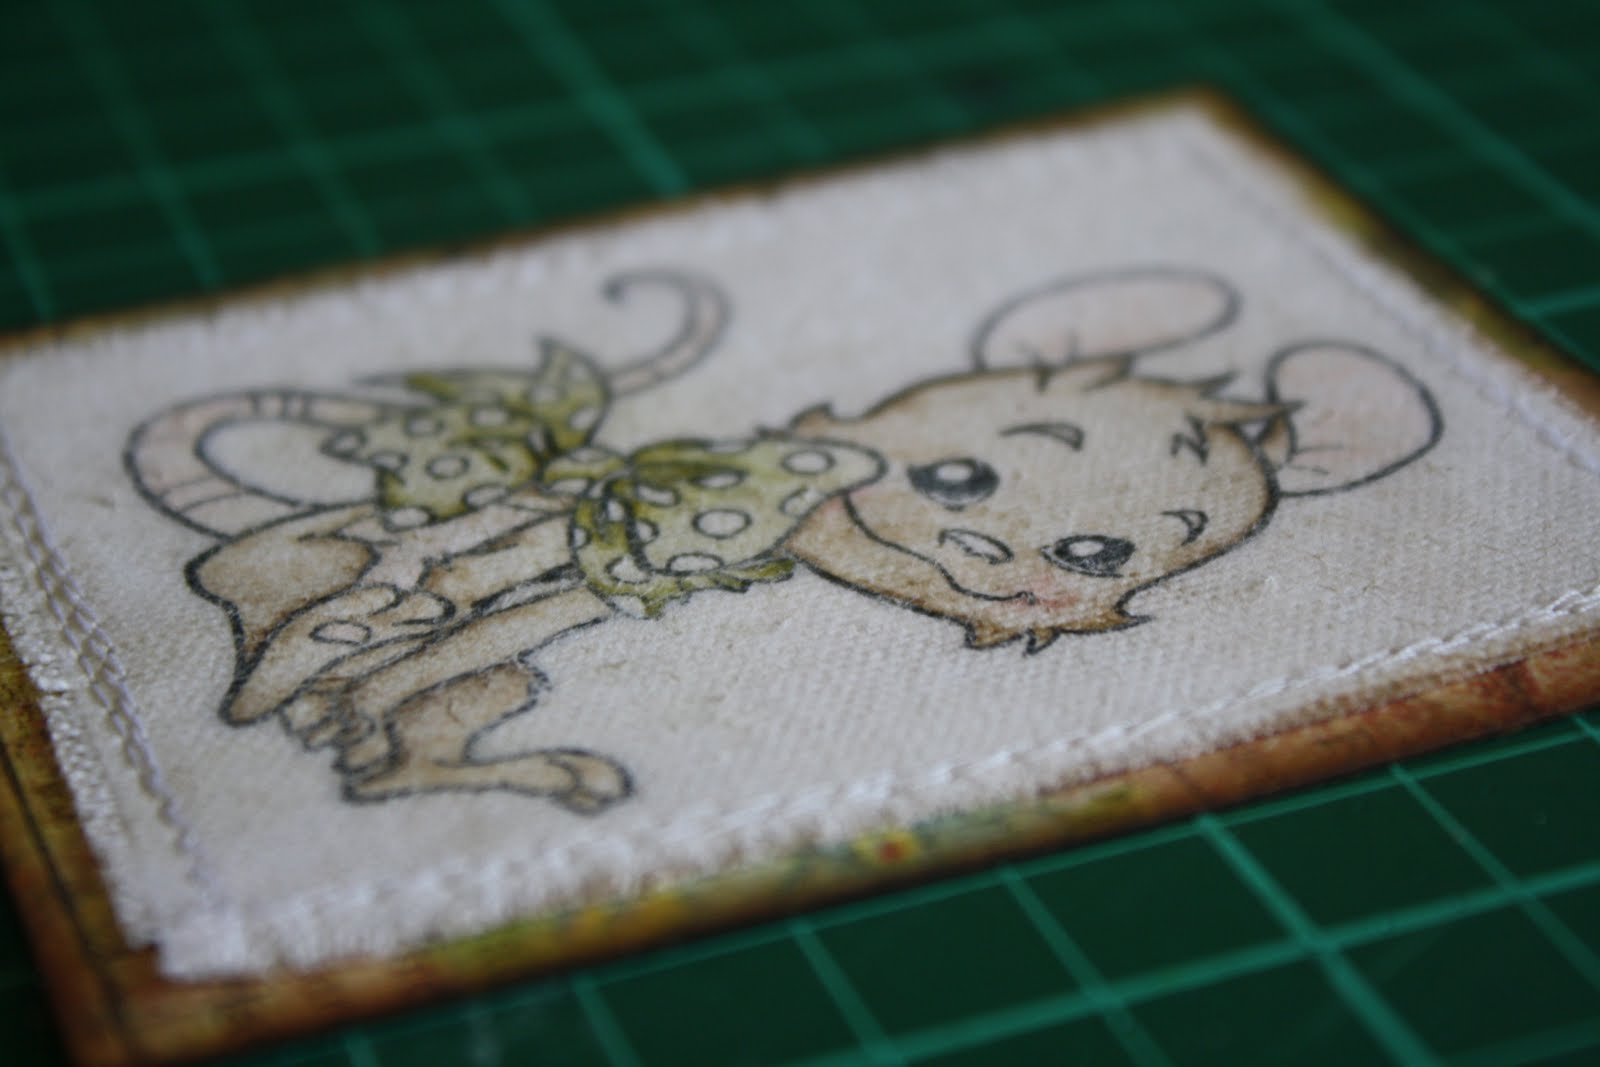
With Staz On stamp your image on Polyshrink.

 You can color with Polychromos as you prefer, I usually use at least two colors
to take depth to the image.....

 Continue to color and don't exaggerate, remember that when Polyshrink reduce
themselves the colors saturate.

Now with a stump wet with oil blend the colors as they merge in.

 Cut the image carefully.

Punch the top and don't use a too small punch because the hole will grow smaller.

Heat the Polyshrink with the heat tool that will grow smaller. As you heat it the piece will crumple.....
don't be afraid, it will be normal again at the end of the process......

Then to help yourself you can put an acrylic block as you turn the heat tool off.

To protect and polish the surface use a gloss.

Here are my charms ready..... aren't they too cute?

I realized a bracelet, but you can also realize earrings, necklaces and more else!!!

I really hope that this way to use the stamps will like you and my tutorial will be helpful.

Thanks for stopping by

Giò

Saturday, January 28, 2012

Wäscheklammern


Die liebe Dunja hatte letzte Woche die gute Idee  Wäscheklammern aufzuhübschen....
Das hat mir so gut gefallen, dass ich es euch nicht vorenthalten möchte und habe für euch eine bebilderte Anleitung zusammen mit Kleine85/Tanja gemacht.
 ~~~~~~~
The lovely Dunja had the wonderful idea to pimp some clothespins. How great!
I was so excited about it that I had to pimp some of them also. So I made a little tutorial with the help from Kleine85/Tanja for you.

Ihr braucht/ you need
Wäscheklammern / Clothespins
Stempelkissen / Inkpad
Textstempel / Text
Bänder / Ribbon
Spitze / Lace
Halbperlen / Half pearls
Rosen / Roses
.....
Ihr nehmt den Text den ihr euch ausgesucht habt und stempelt ihn durch abrollen des Acrylblocks auf die Wäscheklammer. 
Das ist einfacher als es aussieht.
~~~~~~~
Take the text you want and stamp it on the clothespins. The best way for this is rolling up the acrylic block on the pin.
It's easier than it looks like.

 Nun müsst ihr nur noch in eure Dekokiste greifen und Pimpen was das Zeug hergibt
Dies sind meine fertigen Wäscheklammern die jetzt nur noch darauf warten verschenkt zu werden.
~~~~~~~
Then you just have to take the decoration and put it on the clothespins.
Here are my lovely ones.

Viel Spaß beim Nachbasteln
~~~~~~~
Have fun with this tutorial.

XOXO Sonja


Thursday, January 26, 2012

Mini-Album with Henry Adventure/Travel Collection

Hi Ladies,

Ich (Angie) bin ein absoluter Fan von Henry Maus. So auch meine 2 Jungs... jeder neuer Henry-Stempel wird von meinen beiden Künstlern mit dem Stempelkissen eingeweiht. Erst dann darf ich :) Und so war's eine Frage der Zeit, bis ich ein Mini-Album machte ganz und gar mit Henry. Natürlich aus der Abenteuer/Reise Kollektion. Die passt perfekt zu meinen 2 Abenteuern... Auch die tollen Hintergrund-Clearstamps (Punkte & Kreise) habe ich dazu verwendet. Sehr effektvoll, wie ich finde...
I (Angie) am an absolute fan of Henry Mouse. So are my 2 boys... each new Henry-Stamp is inked up first by my 2 little artists. Only then I'm allowed to :) And so it was just a question of time until I made a Mini-Album entirely with Henry. Naturally out of the Adventure/Travel Collection. These fit so perfectly my two adventurers... I also used the great Background-Clearstamps (Dots & Circles). They're so effectfull, as I find...


 Das Mini-Album lässt sich aus der Mitte heraus nach links und nach rechts öffnen. Die Seiten (Quadrate) sind 15x15 cm und aus naturbraunem Cardstock. Die Albumdeckel (Vorne und Rückseite) sind aus dünnem Karton, den ich mit Design-Papieren überzogen habe, was dem gesamten Album die nötige Stabilität gibt (besonders in Kinderhänden *LOL*). Die Henry-Motive und Hintergrundstempel habe ich direkt mit brauner Memento Ink auf den braunen Cardstock gestempelt.
The Mini-Album can be opened from the middle to both sides left and right. The sides (Squares) are 15x15 cm and made of naturally brown cardstock. The album covers (front and backside) are made of thin carton and I've covered with design-papers, what gives more stability to the album (especially between kid's hands *LOL*). I've stamped the Henry-Images and background stamps with brown Memento Ink directly to the brown cardstock.

Wünsche Euch viiiiiiiel Spass mit Henry der Maus :)
Wish you sooooooo much fun with Henry the Mouse :)

Hugs,

Angie & my 2 Boys ;D

Tuesday, January 24, 2012

Henry with Large Bow

Hello everyone, its Colleen here today!! I am sure many of you have seen paper being transferred onto fabric. Now I love the texture of fabric so I have been wondering if I could do this with my stamped images?

Well I eventually had the courage to try, it takes me quite some time to colour my images and the thought of destroying one wasn't a pleasant one.

So you will need:
Stamped image coloured with Copics, Sticky-back Canvas - I used Claudine Hellmuth Studio, water and cardstock, patterned paper and embellishments to finish off your card.

I have used the very sweet Henry with Large Bow and I have coloured him with Copics, as you can see my image is pretty dark because you loose alot of the colouring in the transfer.


Peel the back off the canvas and place your image face first onto the sticky side.


Using a bone folder, rub the image.


Trim the excess canvas and spray water onto the image. While wet, rub with your finger to remove the paper. I found for this part its best to rub the paper softly, if you are to vigorous it will damage your image.


Continue to rub and add more water as needed until the paper has been removed.


This is what it will look like when its done, as you can see its alot lighter but I love the soft look on the fabric!


And my completed card!


Thank you for stopping by today and I hope you have enjoyed my tutorial.

Colleen x
Related Posts Plugin for WordPress, Blogger...