


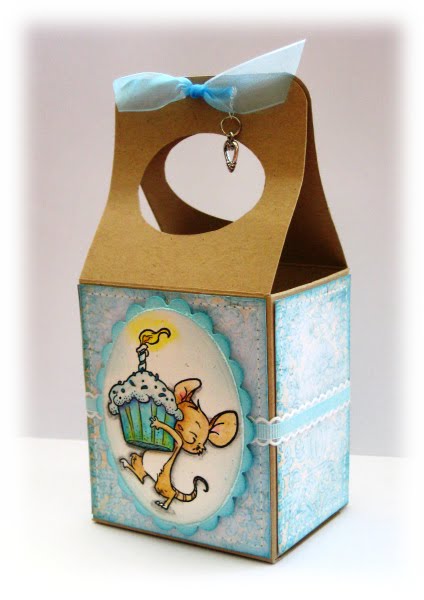
Today I want to show you how quick and easy it is to make a gable box.
This is a perfect package for some sweets or a small gifts.
Let's get started...
supplies:
cardstock in 8 1/2 x 11 inch
scoring tool (e.g. bonefolder)
double sided adhesive tape
patterned papers
ribbon, charms.. any kind of decoration you like
oval punch or nestabilities oval die
stamp (I used Henry Celebrating Mouse)
optional: corner rounder
how-to's:
1. place your 8 1/2 x 11'' cardstock the long side (11'') and score it at 1/2'', 3 1/2'', 5 3/4'' and 8 3/4

2. rotate the cardstock 90° clockwise and score at 3'' and 6 1/2''

3. cut lines as you can see it in the picture below:

4. put doublesided adhesive tape on the flaps as shown in the picture below:

5. flip the cardstock over and place doublesided adhesive tape as you can see it in the picture below:

6. punch out an oval opening from the two handle flaps at the top.
if you don't have an oval punch -like me- you can e.g. use a Nestabilities oval die
as a template to cut out an oval with your craft knife or scissors

7. adhere your patterned papers to the outside of the box
optional: round the upper corners of your handles with a corner rounder punch
(you can also leave the edges angled, if you don't have a corner rounder)

8. assemble the box:
a) close and adhere the two small flaps on the bottom first

b) close and adhere the two wide flaps at the bottom and the small side flap:

9. decorate the box to your liking.
I used Henry Celebrating Mouse and colored him with Tombows,
watercolor pencils, Sakura Stardust gel pen and some Stickles.
I also added some ribbon, and a heart charm to the handle.
I kept my decoration simple in this sample, but you can dress it
up as much as you like it.

I hope you enjoyed the tutorial and everything was understandable! If you have any questions, please feel free to ask in the comments section or drop me an email at fee_mit_zwerg{at}web.de


Merci pour ce tuto je vais l'essayer !
ReplyDeleteoh this is fab - must try it out - so useful
ReplyDeleteAnn xxx
stupendo brava Susy
ReplyDeletelovely box, i should try it for my cupcakes. good job!
ReplyDeletesuch a great tutorial! thank you!
ReplyDeletehi Sylvia
ReplyDeletethanks for the tutorial...so well done ...
hugs
Sylvie
gibraltar
xxxx
What a fabulous tutorial. Thanks so much.
ReplyDeleteLesley Xx
Gracias Silvia, gran tutorial super bien documentado y explicado
ReplyDeleteyour painting on this box is SO beautiful. thank you so much for sharing it with us. i have this stamp but YOU have made it come alive in the most beautiful way! just yummy...
ReplyDeleteYour tutorial is very well done and easy to follow. I can think of dozens of used for the box! Thanks for sharing your creativity.
ReplyDeleteBarb
What a fabulous tutorial, and perfect little gift box. Thanks so much for sharing this! :)
ReplyDeletevery cute gift box! thanks for the tutorial!
ReplyDeleteNice box Sylvia! Thanks for sharing.
ReplyDeleteThanx for this great tutorial!
ReplyDeleteLins x
Sylvia, This is so cute. Thanks for the info. You did a great job with your first tutorial!
ReplyDeleteThank you for this fab tutorial! I made one which you can see here: http://tertia-craftinggran.blogspot.com/2010/06/whiff-of-joy-gift-set.html
ReplyDeleteI just love how it turned out. Hope you like my version.
gefällt mir sehr gut!
ReplyDeleteLG Moni
very nicely written information with beautiful photos of Gable boxes
ReplyDelete