Hi, Lori here with a quick Father's Day Tutorial on how to make a shirt and tie card for Dad. This is a really fast and easy card that the kids can get involved in.
Supplies: Glue, Piece of card stock 9 x 5 inches. Piece of Designer paper 4.5 x 6 oinches and a coordinating piece of cardstock for the tie. Two brads, some distress ink and a Father's Day Stamp.
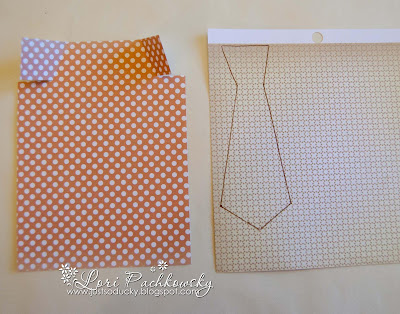
Start with your 6 x 4.5 inch piece of Designer paper. I have used these fantastic Whiff of Joy papers. Cut a 1 inch slit on either side approximately one inch from the top as shown. Draw a tie shape on a piece of matching paper. I just drew mine by hand and used a ruler to make the lines straight.
Next Cut out the tie and sponge all the edges of the shirt and tie using a distress ink. Glue the tie in place and then fold down the two sides as shown to make a collar.
Using your hole punch - punch a hole on both sides of the collar and add decorative brads. This is optional.
Next Take your 9 x 5 inch piece of card stock and distress the edges. Stamp a Father's Day Sentiment and Stamp on the inside. I have used this adorable Henry Stamp called Precious.
Apply glue to the front of the cardstock and adhere your shirt to it. NOTE: I added a small piece of paper to cover the brad backs before gluing in place.
The final card should look like this. The collar will be above the cardstock edge.
My kids can't wait to give this one to their Dad. I hope you'll get your kids crafting and give it a try!


Great Idea, what an wonderfull card creation!
ReplyDeleteLG
Michaela
Schaut ja super aus, tolle Idee.
ReplyDeleteLg, Helga
A wonderful idea. This card is great
ReplyDeleteLiebe Grüße
Margret
Thank you for sharing your wonderful idea.
ReplyDeletemuy lindo, me encanta!
ReplyDeleteCarolina ArteScrap
A really cute card and seems so easy to make, thanks...
ReplyDeleteSilverbutterfly