


Hi! Jane here and today I am going to show you how to create gift bags from 12x12" paper.
You will need:
12x12" patterened paper (one sided)
two 1" x 12" pieces of cardstock
Ribbon
Edge punch
Hole punch
Glue
Scissors
A book less than 6" wide
 1.
1.
 With your paper white side facing use your edging punch along the whole of one edge.
 Your paper will then look like this.
You will need:
12x12" patterened paper (one sided)
two 1" x 12" pieces of cardstock
Ribbon
Edge punch
Hole punch
Glue
Scissors
A book less than 6" wide
 With your paper white side facing use your edging punch along the whole of one edge.
 Your paper will then look like this.
2. Fold the punched edge over so that you have a white decorative edge for the top of your bag. The amount you fold over can be varied - I have folded over 2 1/2" as I am going to be decorating the white area.
 Fold the punched edge over so that you have a white decorative edge for the top of your bag. The amount you fold over can be varied - I have folded over 2 1/2" as I am going to be decorating the white area.
3.
 Turn the paper over and place your book in the centre with the top of the book at the folded edge.
 Turn the paper over and place your book in the centre with the top of the book at the folded edge.
4.
 Now you wrap the book up just like wrapping a present! First wrap around the book and glue or tape in place (careful not to glue to the book!).
 Now you wrap the book up just like wrapping a present! First wrap around the book and glue or tape in place (careful not to glue to the book!).
5.
 Run your finger and thumb firmly along the edges of the book so that the creases are nice and neat.
 Run your finger and thumb firmly along the edges of the book so that the creases are nice and neat.
6.
 Now continue to wrap like a present at the opposite end to the punched detailing. Fold the top section down ......
 ........fold both the sides in ensuring all the folds are nice and neat and apply glue under the triangle sections to add strength to the bottom of the bag.......
 .......finally, glue the last flap up as shown above.
 .....stop creasing near the bottom when you get the triangle effect shown above.
 ....here's a side view to explain this fold further.
 Thread ribbon through the holes and tien in a bow at the front of the bag.
 Now continue to wrap like a present at the opposite end to the punched detailing. Fold the top section down ......
 ........fold both the sides in ensuring all the folds are nice and neat and apply glue under the triangle sections to add strength to the bottom of the bag.......
 .......finally, glue the last flap up as shown above.
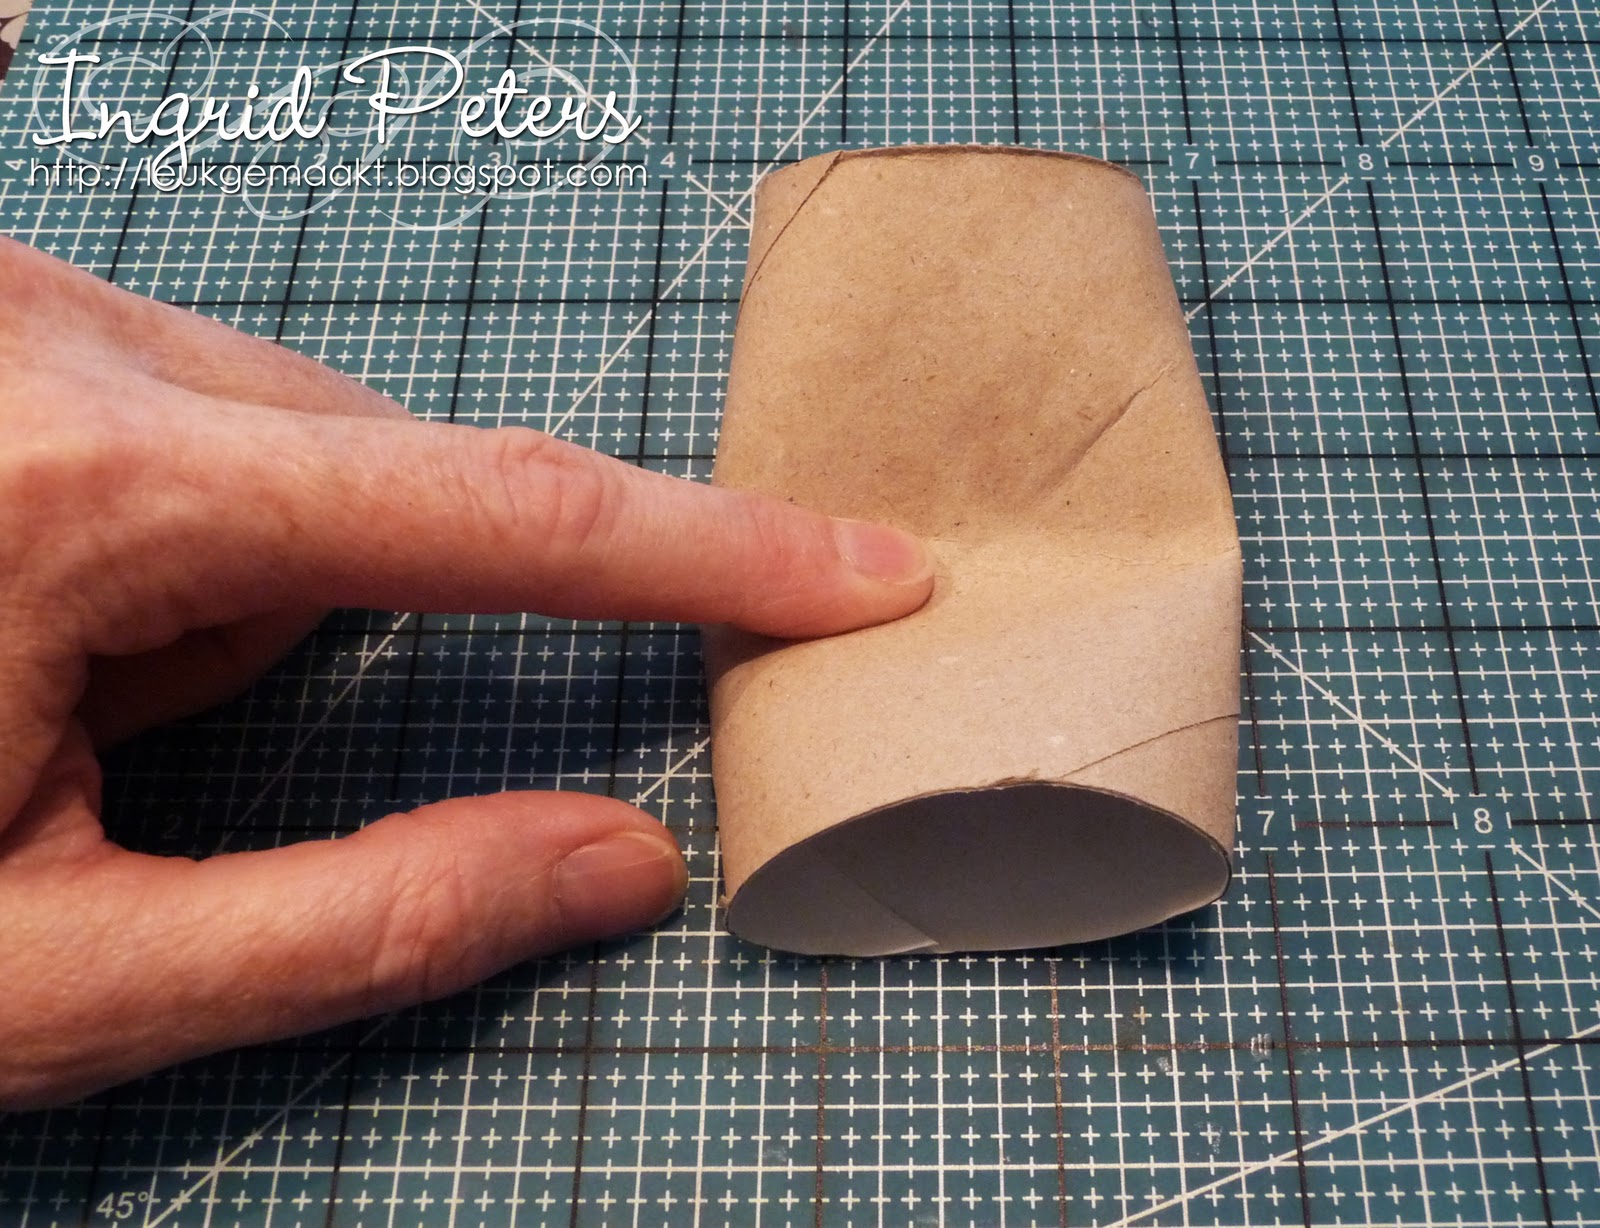
7. Slide the book out of the bag. Pinch each side in half by bringing the creased edges together and continue to pinch together all along the side as shown above.....
 Slide the book out of the bag. Pinch each side in half by bringing the creased edges together and continue to pinch together all along the side as shown above.....
 .....stop creasing near the bottom when you get the triangle effect shown above.
8. This step is optional but makes the bag easier to decorate. Fold the bottom of the bag back on itself as shown above.....
 This step is optional but makes the bag easier to decorate. Fold the bottom of the bag back on itself as shown above.....
 ....here's a side view to explain this fold further.
9. Punch holes in the top of the bag, evenly spaced. (punch the two edge holes straight through all the folded parts of the bag through to the other side so that you also create holes in the sides of the bag).
 Punch holes in the top of the bag, evenly spaced. (punch the two edge holes straight through all the folded parts of the bag through to the other side so that you also create holes in the sides of the bag).
10.
 Thread ribbon through the holes and tien in a bow at the front of the bag.
11.
 Punch along both edges of each strip of 1"x12" cardstock and attach to the inside of the bag to form handles. You are now ready to decorate your bag!
 Here's my finished gift bag using one of the gorgeous new images from the Winter Kit which will also be released tomorrow as single stamps. I have decorated my bag for some Christmas cookies but of course you can create these bags for any other ocassion too! Hope you have enjoyed my tutorial and if you would like any further details of how I have embellished my bag please see my blog post here.
 Punch along both edges of each strip of 1"x12" cardstock and attach to the inside of the bag to form handles. You are now ready to decorate your bag! Here's my finished gift bag using one of the gorgeous new images from the Winter Kit which will also be released tomorrow as single stamps. I have decorated my bag for some Christmas cookies but of course you can create these bags for any other ocassion too! Hope you have enjoyed my tutorial and if you would like any further details of how I have embellished my bag please see my blog post here.
Jane x


