


Good Morning Everyone! Jane here today with a tutorial to show you how to make this lovely little concertina album made using envelopes. I have used the adorable Henry on Rocking Horse to decorate my album.

To make the album, you will need:

4 Envelopes
2 pieces of chipboard
Patterned papers
Kraft card
Embellishments to decorate the cover
A circle or tab punch
Scoring board and tool
Craft knife, bone folder, extra strong wet glue, clothes pegs
Plain card
Step by Step instructions:
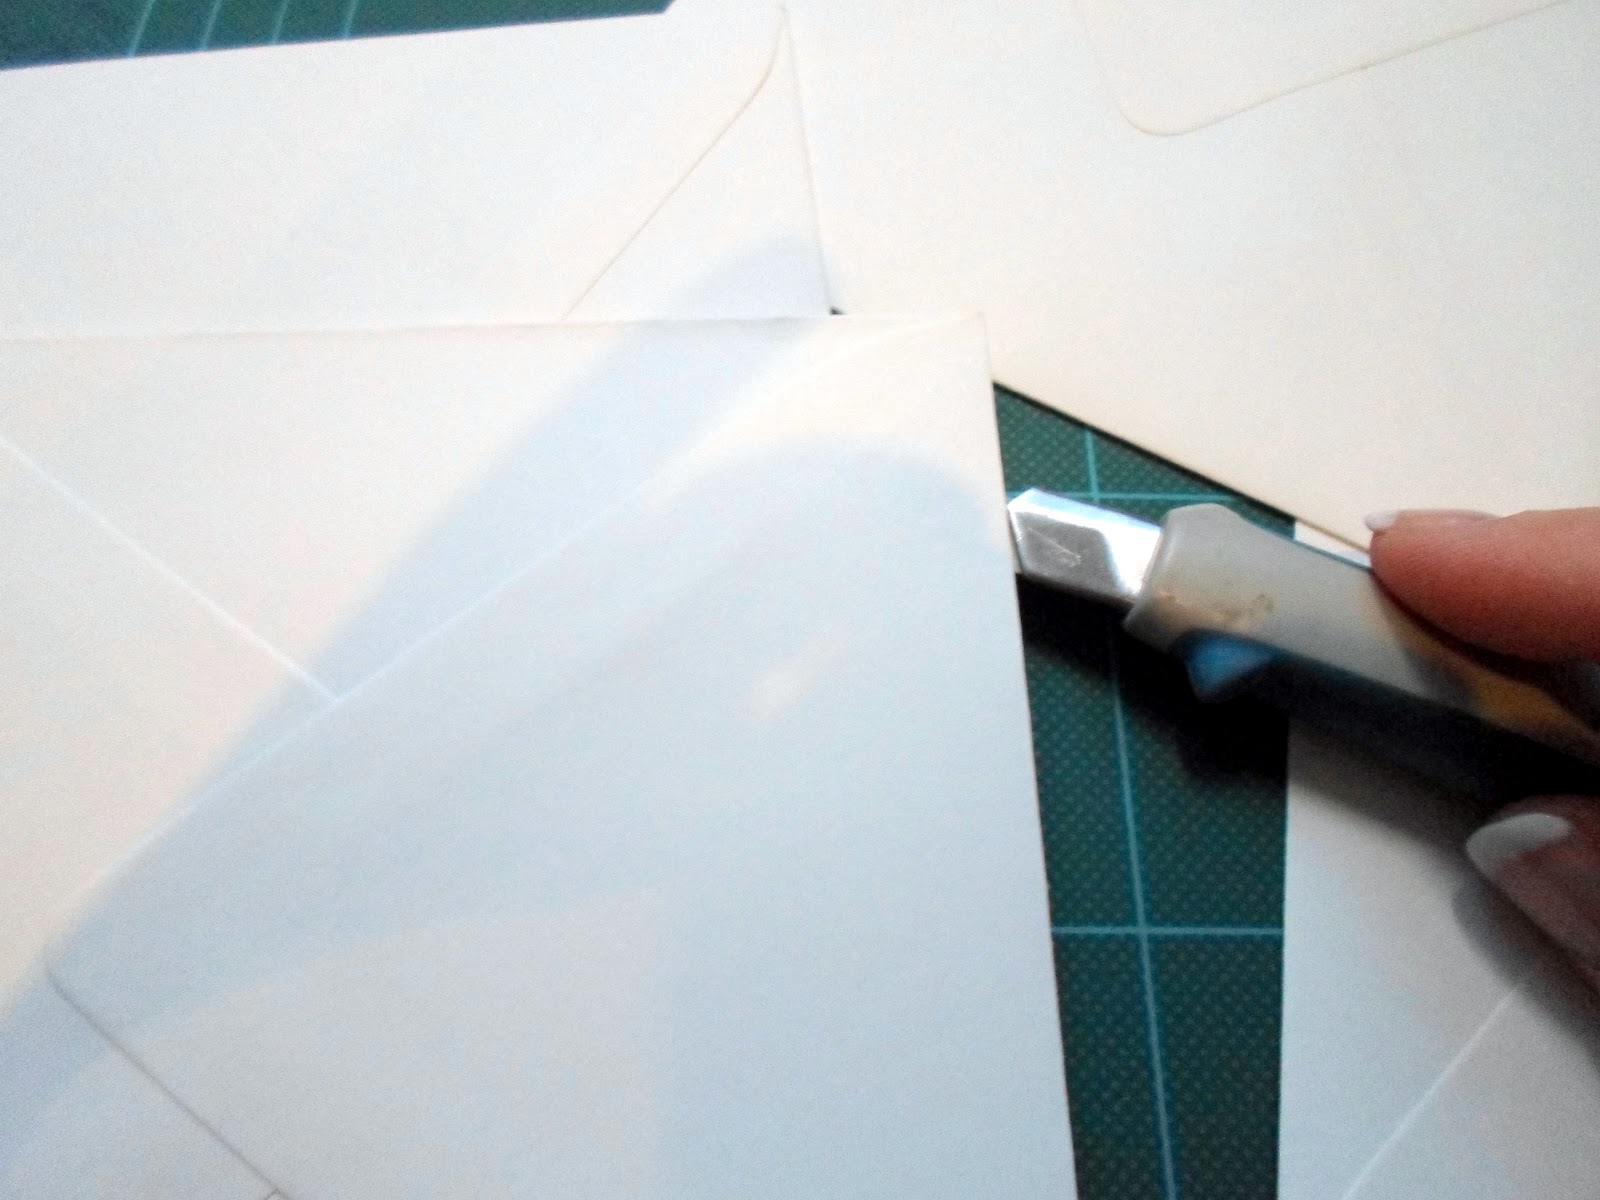
1. Glue down the flaps of all four envelopes and then slit open at the top with a craft knife.

2. Cut two pieces of chipboard the same size as your envelopes and cover with patterned papers. Mitre the corners and burnish with a bone folder until stuck down firmly

3. Cut two more pieces of patterned paper to fit the inside of the covers and stick down with wet glue burnishing the edges with your bone folder to get a neat finish

4. Cut a piece of kraft card 7inches long and the same width as your envelopes. Mine are 5 and a half inches. Score at 1.5 inches and every half an inch until the last 1.5 inches

5. Fold as shown and make sure folds are nice and crisp by using the bone folder. With the piece facing as shown above, add strong glue to each valley fold.

6. Stick together and hold with clothes pins until the glue is dry

7. Remove the clothes pegs when dry and turn over. Stick the cover to the inside of each long tab to form the outside of the book.

8. Stick an envelope behind each tab in the book until all envelopes are in the book

9. Cut pieces of patterned paper to fit each page and stick down with glue. Punch semi circles at the top of each page. Cut a piece of card to fit inside each pocket. Your album is finished now and you can decorate the cover as you wish.

I hope you have enjoyed my tutorial. I leave you with a little close up of Henry. I added a little bow to his hair as my album is for a little girl.
Jane
x


What a great tutorial here, thank you so much. Really easy to follow and well done.
ReplyDeletegorgeous tutorial, goes on my todo list. Hugs, Marion
ReplyDeleteCoucou
ReplyDeleteVotre album est une petite merveille!
Merci beaucoup pour ce tuto facile à réaliser
Bien amicalement
Marie
super! danke schön)))
ReplyDeleteJust adorable!!!! Thank you for the tutorial too....will have to try this....tfs
ReplyDeleteVERAMENTE BELLO....TALMENTE BELLO CHE SE LO METTETE ANCHE IN YOUTUBE SAREBBE IL MASSIMO
ReplyDeleteGRAZIE
CIAO DA ALE
What a great tutorial, thank you for sharing. Hugs! Mojca
ReplyDeleteReally easy to follow...i like it.Gift Card envelopes
ReplyDelete