Tuesday, February 4, 2014
Tag you're it Tuesday
Tuesday, January 15, 2013
Valentine Treat Box Tutorial
First thing you will need to do is die cut out (2 pieces) the lid and the base using the largest shape you choose. I am using Spellbinders Label one shape today. Die cut out the designer piece in the second largest shape now as well.
Set aside these pieces for now. To create your box lid and box base you will need 2 piece of solid color paper. Cut them in 4x4 inch piece of paper for both. Once cut score at 1/2 inch on all 4 sides of each piece of paper as shown. Fold the edges and cut the two ends to create the tabs for the box.
Add your adhesive to the little tabs and also to the bottom of each box. This is what will adhere to your die shapes we cut.
Remove ONLY the side tabs to create your box. Leave the large strips to adhere in a bit. See picture below.
Once both boxes are created you will remove the center adhesive from one and center onto your die shape as shown.
When adding the box to the lid portion I place the box onto of the bottom as shown below. This works better for me when I attach the lid base for centering all edges evenly.
Your box now should look like this and ready to decorate!
Here is my final creation all decorated. I added some lace trim and ribbon along with some pearls for fun. The flowers and his heart have a little bit of sparkle added to them also.
This might be the little project I make for the twins classroom this year for Valentines day. :0) Hope you enjoyed the tutorial, happy creating!
Wednesday, January 4, 2012
Heart Shaped Easel by Jane Johnson
You Will Need:
1 x A4 cardstock
1x 6x6" cardstock
2x 6x6" paper
Image and embellisments
Heart shaped template or die cutting shape
Step 1.
Firstly, the principle is the same if you are using a die cutting heart or a heart template as I am here. Place your A4 piece of cardstock onto your scoring board and find the size of your heart shape as in the picture above (mine is 5"). Remove your template/die and score the cardstock 1/8" smaller than the measurement of the heart (so in my case I scored at 4 7/8").
Step 2.
Place your template/die so that the rounded ends of the heart protrude over the fold as shown in the photo above.
Step 3.
Now, either draw around your template and cut it out or pass the die and cardstock through your cutting machine.
Step 4.
Open the folded heart shape out again and place on your scoring board as shown. On the heart on your right hand side score a line half way down the heart - in my case this meant scoring at 7 3/8".
Step 5.
Fold this score line and you will now have the base of your easel card as shown above.
Step 6.
Cut out a complete heart shape from the 6" square cardstock. Add glue to the part of the base indicated by diagonal lines in the photo above and adherer the heart shaped piece of card to it, matching the shapes together.
Step 7.
Your card base should now look like the photo above and is ready to decorate with papers, image and embellishments.
Here is my finished card using one of the fabulous new images to be released on 5th January. For more details on how I embellished my card please see my blog post here.
Monday, February 14, 2011
Valentine Gift Tag - by Sandie
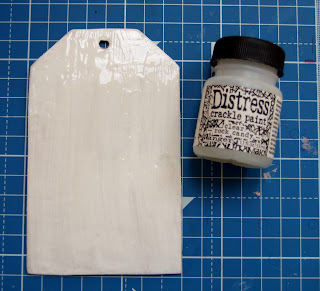
- Chipboard Tag {mine is 4. 75" x 3"}
- White Acrylic Paint
- Rock Candy Crackle Paint
- Distress Ink
- Patterned Paper
- Lace, ribbon, trims
- Embellishments
Tuesday, February 8, 2011
Heart-Hanger for valentine with "Beep-beep, I love you"
HEART HANGER for Valentine with the stamp "Beep-Beep I love you"
I have written a step-by-step tutorial to craft a "heart-hanger.
You can use it for Valentine's day or mothers day as well as for birthdays or simply as a "Thank-You" gift.
Here we go. I will show you how I created a beautiful border
You need:
- 2 long paper stripes
- adhesive tape
- Scissors
- Punch
- Spellbinders heart die
- two hearts - each in a different size
Two long paper stripes
unch each stripe on each side with a a border punch
Now you need the scissors, adhesive tape and both hearts
Cut the punched stripes in intervals 7 times with the scissors up to the hole.
Place the edge of the boarder exactly along the rim of the heart.
Check the picture
Same procedure with the other half of the heart
Now you need to cut at the bottom of the heart with a ruler and cutter the heart in half
This is what the back of the heart looks like
Adhere the back of the heart with a double sided adhesive tape and remove the protective foil.
Glue the punched Spellbinder heart on top

This is how the front should look like
Now you can glue the heart with the heart boarder to the heart hanger.
To finalise you heart hanger you can decorate with coloured images, paper, flowers ect.
Once you have finished decorating you can punch two holes and fix a ribbon
This is what a beautiful heart hanger can look like
Have lots of fun crafting
Your Marushy
Eure Marushy


