Showing posts with label Ingrid. Show all posts

Saturday, December 1, 2012

Christmas wreath with holly

Ingrid Peters
Hello dear readers!
On the first day of December, and on the first day of the Advent Calender, I may show you a tutorial. Yes! Every day one of the dt girls will open a window of the Advent Calender, but the tutorials will also continue :-) So much exciting things for you to find here this month... I hope you will all enjoy them.
My card has no image but one of the Whiff of Joy dies in the picture, the holly die. I will show you with photo's how I created this card.
I cut a card base of 10,5x15 cm and my papers from Echo Park "This and That" and placed a piece of cardstock upon it. I embossed this cardstock with a Cuttlebug embossing folder and then inked the higher areas to let them more pop out.
I made 7 open circles using 2 circle Nestabillities. You can keep the dies in place with a post-it. Glue all the circles together so it will become thicker. Wrap the wreath with a long piece of bakers twine and glue the end on the back. For the ornament behind the wreath on my card I used a Spellbinders tag and cut out the middle, this way it became narrower.
I used the Holly die to decorate the wreath with leaves.
Just a quick way to create a Christmas card with a 3D element on it.
Hope to see you again here, or on my own blog.
O, before I forgot... did you already looked through today's Advent Calender window? To see on who's blog the window has opened today, please read the post below.

Friday, November 9, 2012

Handmade embellishments

Goodmorning dear readers! Today I (Ingrid) may show you a new tutorial. I made a card with a few handmade embellishments. I hope you like the result.
I took the beautiful leaves trio die from last months release and cut them out of my patterned paper. After that I put a little glue from my Pritt roller on the back and attached them on craft cardstock. I sewed them with my sewing machine and cut them out with a scissor in such a way that you do not see the craft cardstock on the front outside the leaves.
 I also cut one of the "cute heart's" out of dessin paper. I stamped on it with a text stamp. With this heart I did the same thing as with the leaves, but this time I used sackcloth in stead of craft cardstock. When all shapes were cut out I inked the edges with Distress Ink Vintage Photo.
I took a piece of fabric that measures 2 by 15 cm and lace up one long side. Tighten thread and you have a flower!
The last decoration I made with Whiff of Joy satin ribbon. I took a piece of cardstock that was narrower than the ribbon and put glue on it with my Pritt roller (or double sided tape). Attach the ribbon overlapping to the piece of cardstock. To give it a finishing touch I also sewed it.
Here you see a detail picture.
I hope you like my little tutorial on handmade embellishments. More details about the coloring can be found on my own blog. Till next time!


Used materials:

Wednesday, October 10, 2012

Wine bottle packaging

Hello dear readers. It's so nice to see you here :-)
Today I (Ingrid) want to show you a creative way to give someone a bottle of wine. You do need a sewing machine but don't need much sewing experience for this project, it's very easy!
 First take measurements on your bottle and add a few cm extra. I took 28 cm.
 Also take measurement of two times the height including the bottom, mine was about 67 cm.
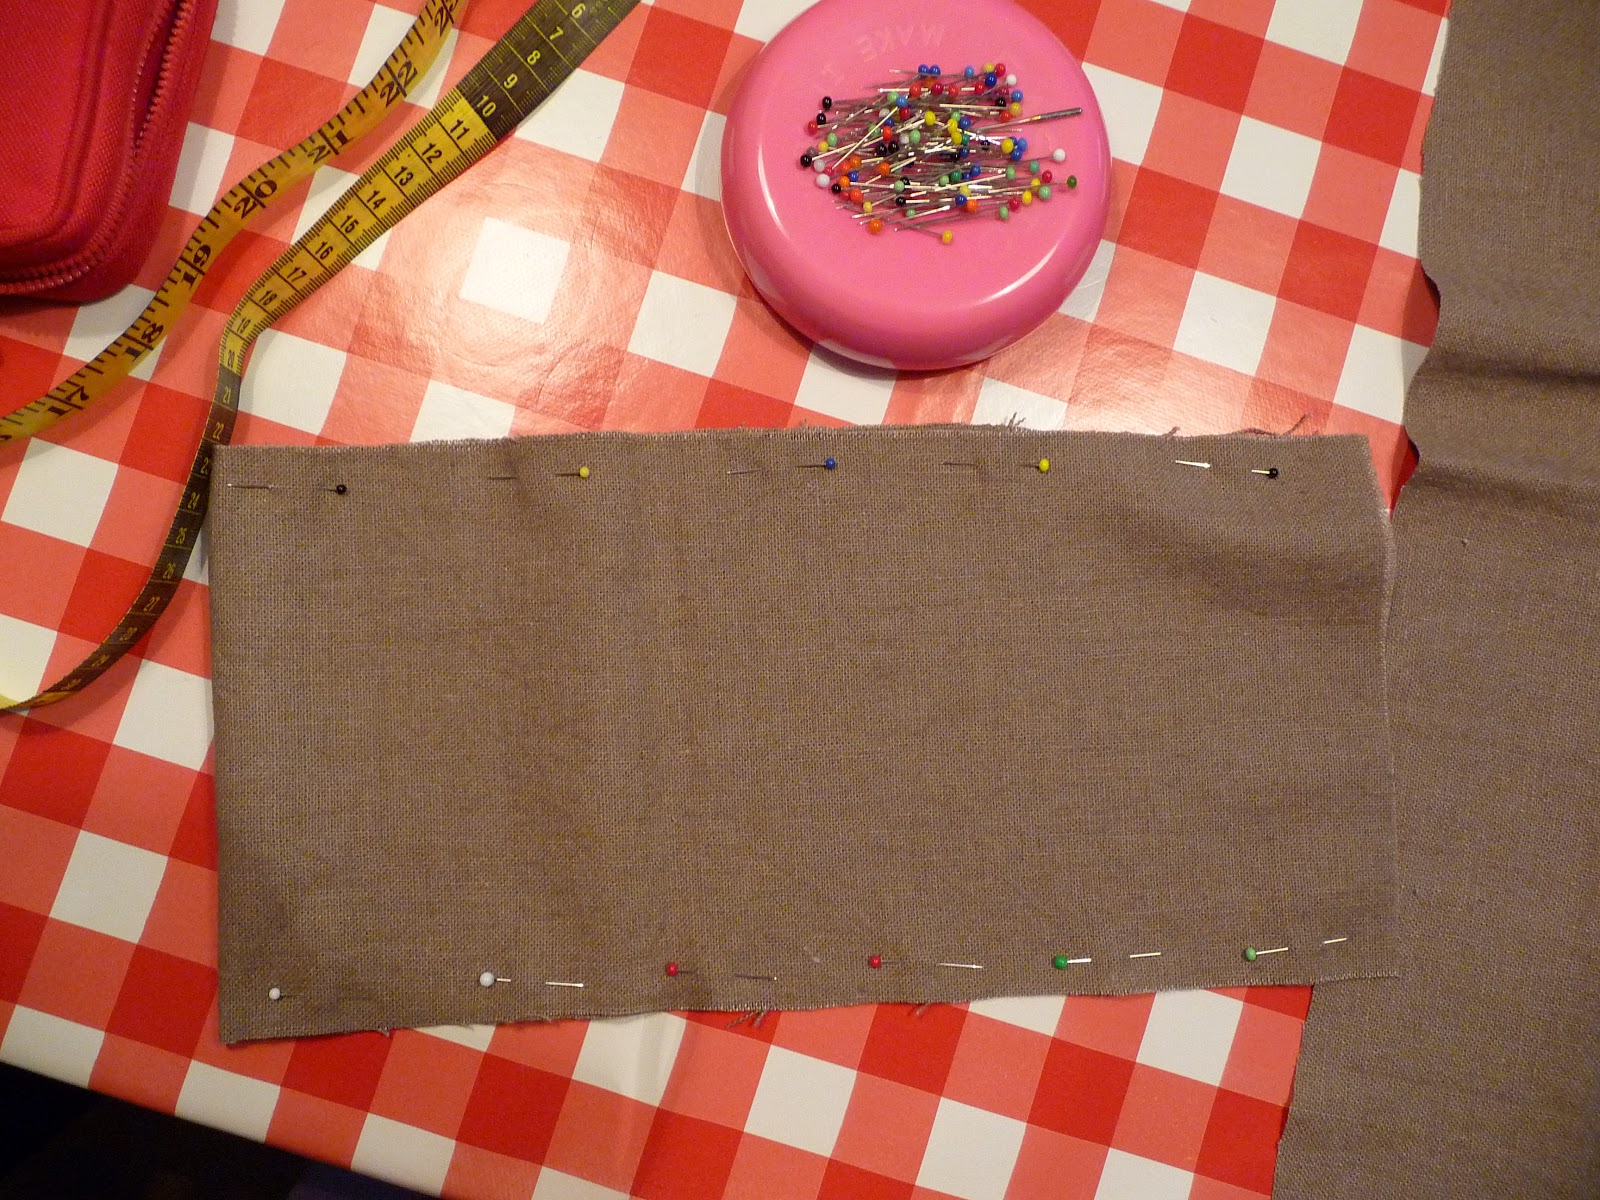
There will be no seam on the bottom but a seam on both sides of the bottle. So I need a piece of fabric that is 67 cm high and 16 cm (28 divided by 2, plus a cm seam on both sides) wide. I used linen fabric.
Pin it with the short sides together and the good side of your fabric on the outside.
Don't use a small stitch length (I used 4 mm), 'cause you want to give it a rough appearance.
 When you sewed both sides of the bag, fold open the seams and press them with your fingers/ nails. To give the bag a bottom you fold a little triangle of the bottom and side of the bag and pin that.
Sew about 3 cm (measured from the point).
Cut off the extra fabric with a seam of 1 cm and then you have a bag. It's that simple! Do not turn the bag inside out before you put your wine bottle in it, I think it's great to show the seams on the outside. After filling the bag you can fold back the top.
Now we can start creating a tag to attach to the bag. Inspired by Katharina, who is very experienced in using background stamps to create her own "dessinpaper", I also wanted to give it a try. I stamped a tag with the background stamp "Friendship".
After that I attached a piece of paper from an old book and my colored image. Then I stamped dots with white ink and put clear embossing powder on it. Next time I'll use white embossing powder to let it pop out some more.
Here you can see the finished tag. I used a stamp from the Fall Stamp Kit, which is also available as digi stamp from now.
 Some Prima flowers and blue Petaloo Vine Spray.
The lovely round sentiment stamp from Whiff of Joy fits perfectly to this project! I also attached a wine glass charm which I bought this weekend on a craft show.
And here is a detail picture of the image. I colored it with Copic Sketch Markers. Here are the colors I used:
Henry: E47, 44, 43, 42, 41, 13, R21, 20
blue: B99, 95, 93
barrel: E29, 27, 25, 23, 21, W7, 5, 3
wine bottle: YG99, 97, 95, R59, B99, E41

Thanks a lot for visiting us today and I hope to see you again soon, here or on my own blog. Have a nice day!


Used materials:

Monday, September 3, 2012

Mini cards with dies

Goodmorning to you all! I'm glad you're back :-)
Today I (Ingrid) want to show you 4 mini cards, made using the dies from Whiff of Joy.
Here you can see all 4. I'll start with the one on the most right side.
The size of this card  is 10x10 cm. I have a piece of paper torn from an old book and stamped Henry with large cupcake on it. I used the pennants die and adhered the flags with 3D tape. The sentiment comes along with the Charlotte on pigeon stamp.
I also attached a little charm from the last collection. These charms are shipped in a cute little plastic jar and vary in size very much, which is really great!
The 2nd card is the "New Home" one with the size of 8x10 cm. First I painted the punched keys (a new die from the latest collection) white, as you can see on the first picture. But I thought they look better when they are darker on the dp that I used, so I punched them out a second time and inked them with vintage photo distress inkt.
 The 3rd card is a birthday card on which I used the cloud die. I think it works perfectly with the sentiment which says: "It's raining love and birthday wishes".
This card has a size of 9,5x9,5 cm. I just used the scrap of paper that I had ;-) I also cut the front of the card  from a different paper and it is 9,5x9,4 cm, this way it will fit in the card perfectly when you fold it.
On the 2nd photo you can see that the Clouds Border Die has a paper guide. You align your paper against it and this way you cut it straight every time. When I don't want my paper to move while I punching, I use a post-it to hold it in place, as you can see on the 3rd photo.
On photo 5 you can see that I fasten my sentiment with staples. I couldn't reach the spot I wanted to fasten my staple, so I opened my stapler, put a soft mat underneath and pushed the staple through the papers. Then you turn your card around and fold your staple to close.
The last one is my favourite :-) The pennant card! Punch a lot of pennants from at least 5 different dessin papers. Cut the pennants separately as you can see on picture 1. Glue the pennants with a glue stick to your paper (not totally, they must keep a loose effect, they only have to stay in place for the stitching). After sewing the 1st row you can glue the 2nd one. This way you don't stitch over the 2nd row when you want to stitch the 1st one...
The sentiment and the lovely green ribbon you see in picture 5 are both from Whiff of Joy, including the button twine.
Well, I hope I inspired you with these little cards. They won't take much time to create and they are perfect to use up those little scraps.
Hope to see you again soon, here or on my own blog. Thanks for visiting!


Used materials:

Related Posts Plugin for WordPress, Blogger...