Hello to you all,
Sonja here ;) glad I made my second tutorial ,it`s just a beautiful card that I just needed for someone I love.
It`s a card that I`ve seen before ,I got mine from the blog Stampartic and I had fun making it.
If there is anything you want to know just ask me.
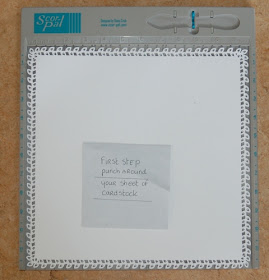
First I started with a 12"/ 12" cardstock 30,4 cm/30,4cm and punched around the hole cardstock.
Click on the Picture for a larger look
I don`t know the measures from the cm into the inches
I made them in centimeters.
4 squares 14 x 14 cm then I cut them each in 2
4 squares 7,8 cm cut them each in 2
2 squares 6,7 cm cut them in 2 ( upper corners )
Here you can see that I glued the triangles into his place.lovely looks :)
I almost forgot,you got to make a paper-belt to close the card.
Mine has the measure 30,4 cm,I added some ribbon and pattern paper.
on top of the belt I glued the the nestabilitie,with the Adorable new stamp from the Secret Summerkit
I hope you like it and please feel free to ask any question if you have.
Hope you will give it a try.
Thanks for the visit,hope to see you again over here or on my own blog
(\(\
( -.- ) xox Sonja
0_(")(")♥♥
Sonja here ;) glad I made my second tutorial ,it`s just a beautiful card that I just needed for someone I love.
It`s a card that I`ve seen before ,I got mine from the blog Stampartic and I had fun making it.
If there is anything you want to know just ask me.
First I started with a 12"/ 12" cardstock 30,4 cm/30,4cm and punched around the hole cardstock.
Click on the Picture for a larger look
After I did that I scored at 3 inch and 9 inch
7,6 cm en 22,8 cm
Turned it and did the same.
After that I started folding at the indicated measuring lines.
Then I made squares and cut them into triangles
I made them in centimeters.
4 squares 14 x 14 cm then I cut them each in 2
4 squares 7,8 cm cut them each in 2
2 squares 6,7 cm cut them in 2 ( upper corners )
I fold the hole card and sharped the lines so that folding the card in the right way would make it easier.
I almost forgot,you got to make a paper-belt to close the card.
Mine has the measure 30,4 cm,I added some ribbon and pattern paper.
on top of the belt I glued the the nestabilitie,with the Adorable new stamp from the Secret Summerkit
I hope you like it and please feel free to ask any question if you have.
Hope you will give it a try.
Thanks for the visit,hope to see you again over here or on my own blog
(\(\
( -.- ) xox Sonja
0_(")(")♥♥

.JPG)


.JPG)
piekna!!!
ReplyDeleteWow! This is so adorable!! Not sure if mine will come out as cute, but I sure will try :) Thanks for sharing
ReplyDeleteThis is really gorgeous! Looks phenomenal!
ReplyDeleteWonderful! Thanks:)
ReplyDeleteSonia
Great
ReplyDeleteTHAT-IS-BEAUUUUTIFULL. LOVE IT.
ReplyDeleteI HOPE MINE COMES OUT THAT PRETTY.
GOD BLESS YOU
Wonderful :)
ReplyDeleteBeautiful and very clever!
ReplyDeleteYour card is beautiful. Thanks so much for posting this tutorial. I have been seeing it and wanted to make one but didn't know how.
ReplyDeleteThank you all,It's so nice to read your comments
ReplyDeleteI loved creating this for the Wiff of joy blog ^_^
Hugs Sonja
damn good.
ReplyDeleteHow adorable is this card I love it.,. Thank you for sharing your tutorials with us xx🦋
ReplyDeleteMuchas gracias por compartir . Podre hacer , gracias a tus indicaciones, una tarjeta tan hermosa.
ReplyDelete